I2C Liquid Crystal Displays
All you need to know about I2C LCD screens on an Arduino Uno.
7/2/20241 min read

Components;
1 Male/Female Jumper Wires
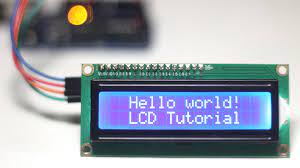
1 I2C 16x2 Arduino LCD Display Module
1 Arduino UNO
Project description;
This project is for people who have an I2C lcd screen and can’t find any videos or projects on how to code them.
The first step is to find a working library of them. I use liquid crystal I2C, and wire. link for liquid crystal $ here $ , link for wire $ here $
The second step is to add the libraries to your arduino ide, to do that you go to sketch-> include library -> add zip library then find it in files. If it works, you should get a message saying it worked.
the third step is to wire it up wire up as follows
GND-> ground
VCC-> +5V
SDA-> A4
SCL-> A5
The last step is to upload the code
(be sure to delete everything from your blank sketch before pasting the sketch into it).
Code
#include LiquidCrystal_I2C.h
#include Wire.h
//initialize the liquid crystal library
//the first parameter is the I2C address
//the second parameter is how many rows are on your screen
//the third parameter is how many columns are on your screen
LiquidCrystal_I2C lcd(0x27, 16, 2);
void setup() {
//initialize lcd screen
lcd.init();
// turn on the backlight
lcd.backlight();
}
void loop() {
//wait for a second
delay(1000)
// tell the screen to write on the top row
lcd.setCursor(0,0);
// tell the screen to write “hello, from” on the top row
lcd.print(“Hello, From”);
// tell the screen to write on the bottom row
lcd.setCursor(0,1);
// tell the screen to write “Arduino_uno_guy” on the bottom row
// you can change whats in the quotes to be what you want it to be!
lcd.print(“Arduino_uno_guy”);
}